
10 Amazing Wildlife Photography Tips for Beginners
Who are these Wildlife Photography Tips for?
These Wildlife Photography Tips for beginners are for anyone starting to shoot wildlife photography. I will be sharing 10 amazing tips that can greatly improve your nature photography! We hope you enjoy these 10 short but super useful tips for getting better wildlife photos. Now, depending on your skill level you might know all of these, some of these, or maybe none of these.
These tips are pretty short and will go by quick but keep in mind that just because they’re short it doesn’t mean they can’t help, in fact being short and easy to implement is what makes them so impactful for beginners. They may seem simple, but keeping these fundaments in mind can make an enormous difference in your photography. We find each and every one of these tricks tremendously useful in my own wildlife photography. And let me tell you, in fact if you only take the first three tips and follow them religiously, I promise you’ll skyrocket the quality of your wildlife images. So, let’s go ahead and do it. Let’ start off with the simple stuff, and we’ll kind of go from there.
The Top 3 Easiest and Impactful Wildlife Photography Tips for Beginners
1.GET OUT EARLY AND GET OUT LATE
2.Drop to EYE LEVEL
3.WATCH YOUR BACKGROUNDS
Now let’s get into each of these first 3 crucial wildlife photography tips a little deeper.
- Get out early and get out late. Yeah, yeah I realize that just about everybody knows this, but somehow I still see photographers starting the day later and wrapping it up by mid-afternoon. I could promise you that all the best wildlife images were shot within a couple hours either side of sunrise or sunset, or they were shot in nice soft overcast. Never in harsh direct mid-day light. That time of day is for scouting locations and maybe taking a nap. So, even if you already know this go ahead and really try to apply it this year. Deliberately skip that bad light and always be out when the light is great.
- Drop to eye level. I see it all the time when photographers are out shooting, photographers pointing down at some poor critter. Now, I’m not just talking about shooting down from a hillside either, although I have to say that’s one of the worst. As a general rule, if you look through the viewfinder, and it doesn’t appear that you’re at least close to the same height as the animal drop a little lower. Now, the further away you’re subject, the less it will appear you’re above it, and of course, subjects that are really close, demand that you drop as much as possible. Of course, sometimes you have to shoot higher than you want because of grass, or brush between you and the animal, but always do whatever you can to get as close as possible to eye level. After all the easiest way to make a photograph that connects with the animal is to have the camera looking right into that animal’s eyes. And it’s much more powerful when you’re at the same height.

- Watch your backgrounds. Okay, I know when you’re out shooting things get exciting, and it’s easy not to pay attention to those backgrounds. I want you to start treating those backgrounds like they are as important as the animal itself, and you’ll watch your image quality just jump through the roof. Make sure everything is level. Watch for busy backgrounds, and most of all make sure there aren’t any distracting highlights from the sky in your photo. In many cases, a bad background can be fixed just by taking a few steps in either direction. Matter of fact, if I had to point to one single technique you can pick up over the first few years that’s will make the biggest difference in your own wildlife photography, it has to be really watching those backgrounds.
THE NEXT 7 WILDLIFE PHOTOGRAPHY TIPS FOR BEGINNERS
4. Never follow an animal. Always try to be ahead of it. I see this all the time. Folks out in parks trying to get a photo by following behind, or staying parallel to an animal as it’s moving along. This usually causes a card full of missed shots, tons of frustration, and usually pushes the animal deeper into the brush. Here’s a trick, try to get ahead of the animal and get to where he’s going. Let him come to you, and you’re going to love the results.
5. To get closer look distracted. So, you want to get closer to an animal? Don’t make the mistake I see over and over by locking eyeballs with the animal as you walk right up to it. An easy way to get close to wildlife is to ignore them. As you approach, take a zigzag route and pretend to be fascinated with all the sticks and leaves on the ground. Take your time. And keep the animal in the peripheral of your vision, but don’t lock eyes. Once you get into range, slowly get your camera pointed, fire away.
6. Outsmart the wind. If you’re faced with a windy Autumn day, you know that it can rack your rig with vibrations. First, make sure you turn on your image stabilization if you have it, it’s really good at helping with those kinds of vibrations. Also, consider losing the lens hood unless you’re pointed towards the sun. The lens hood adds a lot of sail area to the lens and substantially increases the amount of vibration you get from the wind. Just be careful of your exposed front element once you remove the hood. And remember to watch for flair if the sun is more or less in front of you.
7. Use continuous frame advance for sharper images of static subjects. Okay, this sounds a little odd at first but when the shutter speeds start to drop, continuous frame advance can save the day. Normally when we take a photo of a static subject, we only bop off a few images at most. However, when the shutter speed drops, and you have slight movements of the animal, maybe you have a little of your own motion, maybe the camera’s moving a little, if you fire off a longer sequence it can increase the chances of getting a sharp image where everything is still, even if it seems a bit odd to rip off a dozen shots of an animal that’s just standing there staring at you.
8. Make your buffer last longer. Okay, so have you ever run into a full buffer? You know, you’re firing away and all of a sudden the camera starts chugging off one frame every second or so. Well, beyond just using shorter, more careful bursts, here are three quick ways to help keep that buffer from filling.
- The first is to use faster memory cards. The quicker your memory card, the faster the images can get transferred out of the camera’s buffer, and the faster you can get back to shooting.
- The second trick is to switch from 14-bit color to 12 bit if you have the option with your camera. The difference in quality is all but imperceptible, but the file sizes are smaller giving you much more room on your buffer, and the ability to shoot longer sequences.
- The final trick is to shoot JPG. Now, I’m a RAW shooter and while I’m not a big fan of shooting JPG, doing so generally allows for a much longer run for your buffer.
9. Use AF (Auto Focus) points for composition. I can’t tell you the number of people I see who focus and recompose with wildlife. Whenever possible try to create your composition in your viewfinder first and then move the AF point to the eye of the subject. That way as the subject moves it’s easy to re-lock the focus on his eye. If you can’t get an AF point right on the eye, at least get one as close as possible, so you don’t need to move very much to recompose and get your shot. The same principle applies to moving subjects, only now you need to anticipate where your focus point is going to be as the animal runs or fly’s through your viewfinder. The nice thing about pre-selecting an AF point for action is that it makes composition almost automatic, letting you concentrate on nailing the shot.
10. Use the center AF point for tough to focus situations. Okay, I know I just finished telling you to use AF points for composition, but there is an exception. If you run into a situation where you’re having a hard time getting an AF lock, try your center point. All AF points aren’t created equal in most cameras. And some are better in tough to focus situations than others. Of course, which sensors are most sensitive varies wildly from camera to camera, and you know it doesn’t hurt to look up your camera sensor types beforehand. But the one sensor that usually has the best sensitivity is that center one. So, when the AF going gets tough switching to the center point might be worth a shot.
Conclusion to our Top 10 Easiest Wildlife Photography Tips for Beginners
All right, there you go. 10 tricks for wildlife photography to kick off the big game wildlife season this fall. We hope you enjoyed these tips and feel confident in trying them out natures little lovable critters in the field soon! Again, these tips went by quick and you probably already knew some of them, however, these 10 tricks will help any wildlife photography, and I sincerely hope you’ll take them to heart.
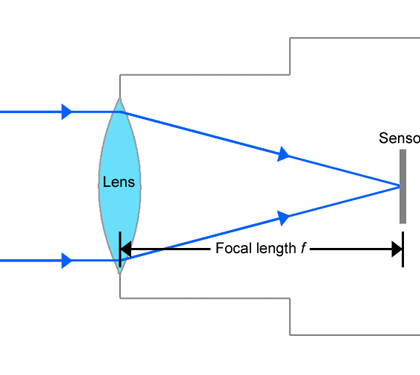
Also, if you are interested in learning other great photography tips – check out guides on ISO, SHUTTER SPEED, APERTURE, and FOCAL LENGTH, which are great for beginners as well. They explain these critical photography principles in an easy to understand format.
Also, if you want to read our guide to camera lenses
REMINDER SOME OUR OUR LINKS ARE AFFILIATE LINKS: So if you decide to purchase something through them we will get a small commission from the vendor, this never increases the price you pay but definitely helps us keep the lights on so we can provide other great content similar to this 10 tips to wildlife photography for beginner guide. So, if you choose to use those links we THANK YOU! If not, no worries we still love you and hope you come back real soon!