

Welcome to Our Easy to Understand ISO Photography Definition Tutorial Guide
What is the Definition of ISO in Photography?
ISO controls the amount of light the camera needs and is a representation of the sensitivity of the image sensor. As the ISO increases, the light it takes to expose the image decreases. For example, doubling the ISO from, say, 400 to 800 results in the camera needing only half as much light for the same exposure.
Iso works in conjunction with shutter speed and aperture control to optimize the image quality in any environment. Shutter speed and aperture control the amount of light physically hitting the sensor. ISO works on the back end to set how sensitive the image sensor receiving the light is. Learn more about Aperture and Shutter speed by reading our easy to understand guides on Aperture Definition and Shutter Speed Definition.
This is the main reason such high ISO values are used in indoors, especially at sporting events, and for photographing wildlife. Scenarios that require faster shutter speeds limit the amount of light that will be allowed to enter the camera and thus the sensitivity of the camera’s light sensor must be turned up to compensate. When you are trying to get a crisp photo of something in motion you need to freeze the action quickly, this is very common in sports photography or wildlife shots. Needing a fast shutter speed to freeze action, and often with limited light available, photographers pump up the ISO as far as they’re comfortable doing.
Video Example of Night Photography Changing ISO Only
Increasing ISO has drawbacks in noise, color accuracy and dynamic range- illustrative comparison to a microphone.
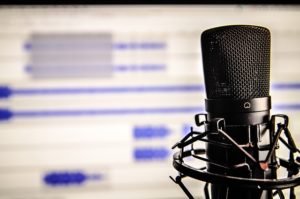 Increasing your ISO doesn’t come without drawbacks. Let’s compare a camera to a microphone. Microphones gather sound waves from a source, just like cameras gather light rays from the environment, and each turns them into electrical signals, which are outputted as either a sound file for a microphone or an image for a camera. Now, what happens if you’re trying to record something very faint, like a whisper. You increase the sensitivity of the microphone. However, besides the whisper being louder, background noise is amplified as well. And you may even hear the hum of the microphone’s electronics.
Similarly, increasing the ISO of a camera increases its sensitivity to everything, revealing any lighting artifacts, as well as any electrical green in the system. This phenomenon is referred to as noise in the world of photography. Higher ISO values don’t just produce more noise. They also reduce the color accuracy and dynamic range. So you should use the lowest ISO value possible at all times. The lowest ISO value of your camera is considered the base ISO, a term that you may come across in the future. This ISO produces the best image quality and lowest amount of noise.
Here is a quick video showing ISO Noise increase side by side.
The ISO Setting Needs Change with the Level of Ambient Light
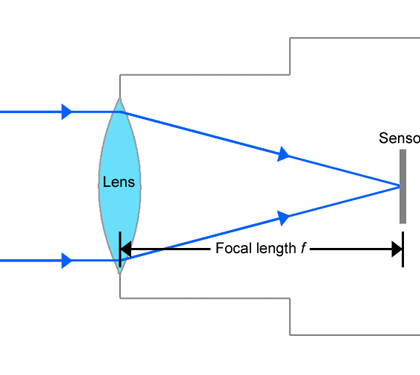
As stated earlier, low ISO values require lots of ambient light to properly expose the scene. It’s also worth mentioning that not all cameras will have the same ISO profile. The ISO performance of your camera largely depends on the size of the photo sights in your camera. What is a photo sight? When you press the shutter button of your camera, the curtain in front of the image sensor slides up, exposing the photo sights to ambient light. The photo sights gather photons that enter through the lens, and once the exposure is over, the curtain slides over the sensor and the camera assesses the number of photons that were gathered, converting the number into an image.
Larger sensor cameras allow for larger photo sights, which can gather more photons, so full-frame cameras have an advantage over crop sensor cameras. Also, lower megapixel counts mean that each photo sight is allowed to take up more space on the sensor, increasing photo sight size. However, older, lower megapixel sensors are not better for low light shooting, as advances in micro-lens design in the silicon itself, have made modern sensors more efficient.
You can check out and compare the latest prices for various types of Full-Frame Cameras on Amazon.
So When Should We Use Low and High ISO Settings?
Remember that in every case, you should try to decrease your ISO as much as possible to retain image quality, but sometimes you may be forced to use higher ISO’s. Low ISO’s are particularly useful in outdoor photography where the sun will provide lots of light for your camera, allowing you to more freely use faster shutter speeds and smaller apertures.
General Rule of Thumb for ISO settings in indoor settings.
ISO for indoor photography is largely situational. Depending on how well lit the area is, you may want to use higher ISO values. Remember that if your subject is not moving, you can use a slower shutter speed, or if you’re okay with a shallower depth of field, use a larger aperture. This will largely depend on your subject, filming little kids is hard to get them to keep a pose for too long, adults can do this a little better, obviously, professional models used to holding a pose make life a lot easier when it comes to this.
General Rule of Thumb for Night Photography and ISO settings.
Night photography, whether it will be moonlit, a photo shoot, or astrophotography, will inevitably require high ISO values. This is where you need to experiment with your camera to find out how far you can push it without serious drawbacks. That is why it is so important to learn about ISO, Aperture, and Shutter Speed together and how you can manipulate them together to optimize your photo results in any setting, regardless of environment.
ISO, while appearing to be a complicated subject, is actually very simple. By exploring your camera’s ISO profile and realizing when to use high and low ISO’s, with an understanding of the principles of image noise and sensitivity, you will be able to directly improve the quality of your photos, and be more comfortable with your camera.
Conclusion on our ISO Photography Definition Training Guide
We hope you enjoyed this article and feel more confident understanding and manipulating the ISO settings on your camera now. We always aim to make our training guides complete and simple to understand. We hope you found this article up to snuff when it comes to those driving principles. Also, A reminder that some of the links in this article and website are affiliate links, so if you choose to purchase something through them we will get a small commission from the store. If you do that, THANK YOU SO MUCH, ITS MUCH APPRECIATED! That’s our idea of trying to keep the lights on and continue to provide valuable information for our readers. If you don’t want to use our affiliate links, no worries, we are still grateful you stopped by, and hope you do it again soon!


Comments
10 Amazing Wildlife Photography Tips for Beginners that Are Really Easy!
[…] if you are interested in learning other great photography tips – check out guides on ISO, SHUTTER SPEED, APERTURE, and FOCAL LENGTH, which are great for beginners as well. They explain […]